Friday 15 March 2019

Premiere Pro - Perfect Slideshow - 3 - Dynamic Systems


Before starting this slideshow, I had to collect a certain number of images. I only needed to do 10 levels, but I did 15 because I was starting to have fun with the game.
Once I had all of my screenshots, one of the beginning of each level, one of the solution to each level, and one of the title screen, I got to work on assembling the video. First things first, I created a new sequence, followed by setting each image to last for half 1/10 of a second (except the title screen), and moved them all onto the timeline. Once they were all there, I had them all zoom from 100 to 145 (I made those adjustments to one image, then I copied and pasted the attributes to all of the image, as I was careful to make them all close to the same size). I then overlayed the title on top of them, and made it zoom in to the same degree as the others, but over the full duration (which was 5 seconds) rather.
Once I was done with my intro sequence, I made all of my scenes by simply dragging them onto the timeline, this time making them last for 2 seconds rather than the 1/10 of a second I had previously. I didn't make any adjustments yet, I just wanted to know where my closing sequence would be.
My closing sequence was to be a duplicate of my opening sequence, so I copied it and pasted it to the end, so save me the trouble of recreating it. I needed to add titles next.
For the first title, I grabbed an ellipse tool, and filled in the circle on the title screen during the intro. I coloured it black, set its opacity to 90%, and went to the text tool. I set the opacity to 100%, made the text red, and wrote out "Solutions Slideshow", resizing it to fit in the circle.
For the outro, I did the same thing, but I wrote out "Dylan IT 12", making the text white, except for "IT", which I made blue.
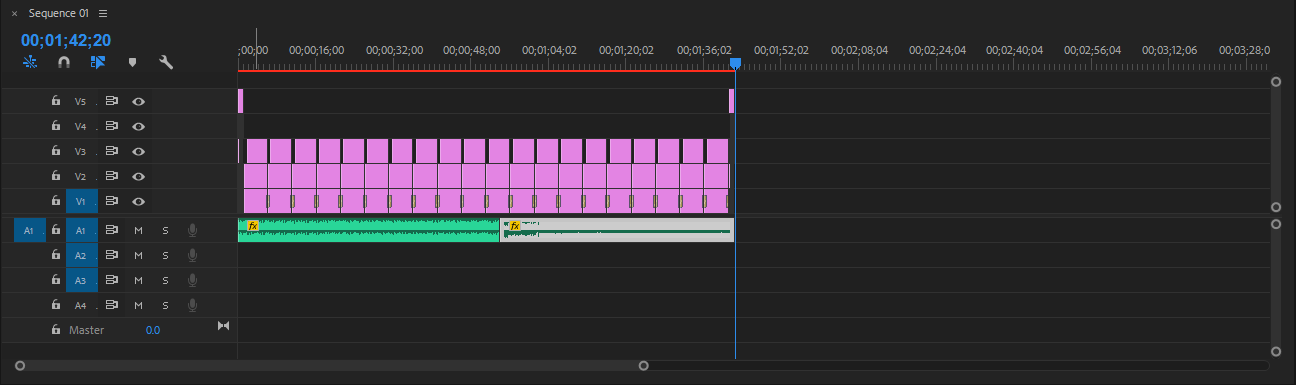
I then went on to make a title for every puzzle that I had a picture of, making sure to make them the same size (I duplicated the title whenever I swapped puzzles as to avoid re-making the title box). I them overlayed them on top of their respective puzzles, making them stretch from the beginning of the puzzle to the end of the solution, and I added some "fade to black" transitions between each one.
I then make the adjustments to the pictures. I slowly made the puzzle photos zoom out, and applied a Gaussian Blur for their last 1/10 of a second (as they were all the same length, I did this once and copied and pasted it to all 15 puzzle photos). For the solution, I started with a lot of blur, which went away as quickly as it came on the puzzle photos, followed by the picture zooming in to the original size of the puzzle photo (as they were all the same length, I did this once and copied and pasted it to all 15 of the solution photos).
Following that, I added a slide transition to the end of the last solution, as it was meant to be a unique transition, and I hadn't used a slide transition anywhere else in the video.

Monday 11 March 2019

Premiere Pro - Perfect Slideshow - 2

This slideshow was much like the other in terms of difficulty and content, so I will keep the explanation brief. I created a new sequence, I imported my videos, and I set them all to last for 1/10 of a second. This is where things changed, however. Rather than simply zooming in, I wanted to make them all go very quickly from right to left, which looks fairly good compared to what it was before, but also keeps it rather short. I then continued to do everything normally, making all of my images 5 seconds long, making them shift from right to left, but then another thing needed to be added; transition effects.
I found a bunch of transition effects on the side of the window, the same as the video effects, and I wanted to make them happen before an image flies on screen, and after it flies off. This is simply enough, because all transition effects are the same length, however, I did need to place each effect before I could start moving any images, which was a pain as I had to find out what transitions to use, and then some images went to the right a little bit about halfway through their movement, which I was unable to fix.
Following my transition effects, I copied the intro sequence and placed it at the end, and went to make my titles.
I went for a blue background for this. I made a text box, and typed out the words "My IT Slideshow". Once that was made, I made a closing title, but on a red background, which simply said "Dylan IT 12", with IT being made blue again.
Now that I had that done, I had to make the titles for each image. This was quite tedious to begin with, as I had to keep them all the same size, so I had to repeatedly trace the box that I had made, however I found an easier way. After I made a box, I would duplicate it without closing the title window. The duplicate would remain the same as I make changes to the original, and as such, I wouldn't have to repeatedly make the same box over and over again.
After making 20 boxes, I placed them with their respective images, and had them all come in just after an image appeared, and had them leave just as they were leaving. Because they were all the same size and coming from the same spot, I was able to copy their movement attributes from one of them to all of the others

Wednesday 6 March 2019

Premiere Pro - Perfect Slideshow


Making this video wasn't especially challenging, I have experience using Sony Vegas, which is essentially the same kind of program. I started out by importing 10 pictures of Santa Claus, and then selecting them and bringing their times down to 10 seconds. Following that, I made them take up the page, as well as zoom in very quickly. I then duplicated each image and set them all to exist for 5 whole seconds. These images were made to zoom in very slowly, before applying the gaussian blur effect, which is found on the right hand side of the window. Finally, I duplicated each of those images again, and rather than let them zoom in, I made their sizes smaller than the screen itself, before allowing them to come in from the side. It was at this point that I deviated from the tutorial, I didn't like the images staying there until they were told to pop out of existence. Instead, I had them go from right to left very slowly, until they reached the end of the screen, where they then flew off. After that, I duplicated the into sequence, and I made my titles (found in "File-New"). My first title, I made a translucent red background. I made a text box, set the text to white, made some font adjustments, and typed out "Santa Claus Slideshow" (adjusting the spacing between each letter according to the font). After that, I highlighted the word "slideshow", and changed it to red. Once it was made, I put it in my intro sequence, and made it slowly zoom in so once all pictures were displayed, it would cover the screen.
My second title was much simpler. I just grabbed the title that say "Dylan IT 12" and saved it, having it fall from top to bottom.